Home AboutGiveawaysRecipesOur Town SeriesReviewsShop
Another PRETTY BIRD CASE added to the flock!
This week I finished my most recent work in progress...another sequin & beaded bird soft case for either glasses or phones.

Find it in my Etsy shop!
My fabric selection for the Aiming for Accuracy Quilt Along.
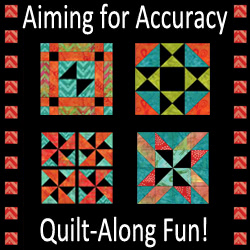
I'm joining in The Quilting Gallery's {QAL} Aiming for Accuracy.

If you are interested in joining in the fun, click here for all the details.

Aiming for Accuracy Quilt-Along
Handquilted Scrappy Tulips
Roughly a year ago, while reading a favorite quilting magazine, I found this tulip quilt pattern. However, the quilt in the magazine fit a twin size bed. I am always on the look out for ways to minimize my ever growing scrap box. I decided on scrappy tulips, adjusting the magazine's suggested block measurements to my liking.

A pleasant afternoon and a warm cuppa was enjoyed choosing fabric - bright, cheery, "Spring" colors for the tulip petals; vibrant greens for the stems; put-a-smile-on-your-face polka dots, checks, and florals for the filler blocks.

A Happy Scrappy Wall Hanging
It's not perfect. It's handmade.

And, I am delighted with the finished product.


Soft case for your Android or eye wear.
My previous post with tutorial led to this sequins and beads soft purple case. I enjoyed making the pink sparkly case so much I just had to make another one.

Each bead and sequin was sewn on by hand. Needless to say, it took me a few days to finish. I took it with me over the weekend while I visited my nephews. Whenever I could find a few moments of quiet, I would work on it. You know those small snack size zip lock bags? They worked great for traveling with sequins and beads. Just the right size and no spilling. I even had room inside the baggies for my thread and thimble. My nephews, an 8-year-old and a 4-year-old, were curious about what I was doing. I showed the 8-year-old how to sew a bead onto the center of a sequin. He gave it a try. The 4-year-old like touching the beads on the colorful bird and watching the purple sequin and bead outline grow. "Hey, you gave it a beak!" He impressively exclaimed.

This little beaded beauty is now in my Etsy shop. Just click the Pink Scissors Design logo on the top left - you can't miss it.

Cell Phone Case - felt, sequins, beads...so sparkly!
Two days.

It took me two days to sew on each sequin and bead - by hand!

Surprisingly, I didn't mind.

Hand sewing is relaxing.

I enjoyed watching the simple felt become a thing of beauty with every sequin and bead I added.

Materials Used:

raspberry Felt (hot pink)
tangerine Felt (bright orange)
batting
white cotton thread
pink cotton thread
pink sequins
pink beads
silver seed beads
light pink sequin trim (it's like a sequin ribbon!)

Tools Used:
pink scissors
pins
thimble
needle
Mom's sewing machine
my own nimble fingers
reading glasses*

The Creative Process:
Measure Twice, Cut Once
I "measured" my cell phone case. By "measure", I mean I eyeballed it...placed my cell phone on the pink felt added an extra inch for seam allowance and mistake making, and cut out the size felt I needed. Then, I placed that piece of felt on top of the orange felt and cut out the same size. Finishing up the measuring by placing the felt on top of the batting and cutting out the size I needed.

Pin in Place & Sew Straight Lines
I "sandwiched" the batting between the pink and orange felt, pinned it all the way around, flipped on the sewing machine, and stitched all the way around my rectangle shape. Once I finished securing the batting in place, I decided on a diagonal design, and started sewing from corner to corner. I lined up the foot along the completed stitching line, insuring straight stitches. Now, I had a design to follow to sew the sequins and beads on by hand.

Busy Hands Are Happy Hands
Grandmother always used to say this to me. She was right. I happily followed the diagonal lines as I secured each sequin and bead in place by hand. And, the time flew by! First, I stitched a sequin in place. Next, I threaded a bead on the needle, carefully drove the nose of the needle into the pink felt, through the batting, and out the orange. Good...bead tightly fixed in place. I moved on to the next and so on, and so on, and sew on! One more thing to do before I stitch it together so that it will hold the cell phone...hem the top edge. I trimmed off excess felt/batting, leaving a clean straight edge, folded down the top edge, and stitched it down by hand.

Seams to Me
Ah, the tricky part! The quilting the felt and batting sandwich helped flatten down the bulkiness of the three layers, but it was still too thick to fit under the sewing foot. I had to sew the seams together by hand. This was not easy and quite time consuming. Especially since I did it once by hand with a blanket stitch all the way around. Right sides together, I turned it right side out, and discovered that it needed something more. A flash of inspiration. I unpicked the beautiful blanket stitch and hauled out my silver seed beads and light pink sequin ribbon. I covered up the remaining white thread with the silver seed beads. I pinned the light pink sequin ribbon right side facing the right side to the pink felt now with sequins and beads. By hand I stitched it in place all along the seam line. Finishing off, I turned the case right side out...BEAUTY! I now have a pretty pink sparkly case for my cell phone.

Comments, Please
I'm so pleased with this project that I've already begun working on a second one and will be adding this item to my Etsy shop, Pink Scissors Design.

What color would you like to see offered?

*reading glasses - these came with turning 40 this year!

Linking Up
I'm linking up with these fantastic craft link parties!
A Crafty Soiree

Suzys Artsy Craftsy Sitcom


Somewhat Simple

The 36th AVENUE
Russian Doll Sweet Dreams Pillows NEW from Pink Scissors Design! Top Row Left to Right: Ekatarina, Iryna, Oksana, Anastasia; Bottom Row Left to Right: Viktoriya, Natasha, Tatiana, Svetlana
Smiling eyes, rosy cheeks, and a heart shaped mouth, these sweet babushkas are cuddle ready for quiet time, nap time, and bed time. Terrific secret keepers and they love slumber parties. Perfect as a pillow for decoration or a soft toy for play.

Measures approximately 20 inches tall and 17.5 inches wide.

I made these darlings while in America. These beauties ship from America - $5.20 shipping to America!

Visit my Etsy shop - Pink Scissors Design - doll section and adopt yours today!

A Lovely Year of Finishes


Just in time for Valentine's Day! A "L-O-V-E" pillow.
With the snow flying and two feet forecasted by Saturday, I am enjoying my wintry Michigan holiday by staying indoors sewing. A needle and thread and buttons are keeping me quite happy, as I work on this patchwork pillow. I had been collecting fabric scraps and carefully chose some pink ones for this pillow. I was delighted to discover that my mother has a very large container of stray buttons. I emptied the container of buttons, pouring them into the largest mixing bowl I could find in my mother's cupboards and took my time selecting buttons to use for decorate this charming Valentine's pillow. Are you working on any Valentine's projects?

I'm linking up with:
HookingupwithHoHSomewhat Simple
The 36th AVENUE
View from front window. Picturesque, but frigid. Best to stay indoors and sew.
Plum & June is a sweet little sewing blog which hosts a weekly link up where everyone shows off their sewing skills. An Arctic Blast hit Michigan this week, and much of North America, making staying indoors cozy and warm essential. I've been in the USA for about two weeks now and unfortunately have been getting over a bad cold. Still, I have enjoyed the quiet, relaxing activity of sewing and drinking cup after cup of hot chocolate.

I've been brainstorming sewing projects for Valentine's Day. Here's one I recently came up with. I'd love to know what you think of it. Personally, I fell in love with the little beauty and am keeping it for myself. I'll pack it up snugly in my suitcase and fly it back to Australia with me.

Sweet Heart Pincushion for Valentine's Day.
I have a half dozen or so more of these sweeties cut out waiting to be sewn up and finished with a lovely button and bow. Don't you just love that cute little love heart button on the center of the bow? I think it is adorable. I have four more. I won them in a blog giveaway. They came all the way from South Africa. These beautiful buttons are handmade and fully washable from Button Mad.

I will soon be listing Sweet Heart Pincushions in my Etsy shop.

I'm off now to visit the other crafty/quilty bloggers linking up with Plum & June. I hope you will join me in the fun.
Plum and June

also linking up with:
I Heart Nap Time


Tuesday, September 18, 2012
/
Big lizard. Jumpy, too. Click to enlarge.
So today Mrs Speech and I went for another of our walks - we were out about two hours. The rain threatened (but that's all it does - we have had .2mm rain in two months) but didn't break on us, which was nice. In fact, the monstrous thick cumulonimbus clouds thinned above our house by the time we returned, and I ended up with a sunburned face.

We actually had a little nature hike thing going on, walking the length of the section of the bikeway that runs through our area, through the bushland which swallows it up. We came across a scrub turkey, scratching at a dirt hill as though foraging for food (maybe it has young somewhere near? It is spring here after all). Could be the same one we saw the other day. One day we'll catch it. Din-dins!


1. We spooked this guy and he moved a little.

2. Carefully moving in close to get a pic of this guy.

3. He's just sunning himself.

4. I cautiously moved in closer. His Komodo cousins in Sri Lanka eat people.

5. He soon moved off into that big hole under the tree.
Also, about thirty minutes into our walk, Mrs Speech clutched my hand in a grip of cold icy fear, and I stopped in my tracks, and looked at a massive lizard which lay on the stump of an overturned tree. They're incredibly skittish and this one moved as we passed. I managed to tip toe close and get some pictures though. Then he skittered away. He was just getting some sun I guess.


Today we began gearing up for Mrs Speech's new Etsy shop - Pink Scissor Designs - which she will use to sell her crafty creations. We've not put much up yet - just her Jesse Tree Ornaments, but more is to come. I personally am excited by Christmas already and the Jesse Tree Ornaments are putting me even more in that frame of mind. We took some photos today of what she has done, and broke out our smaller Christmas tree to hang them on.

We've put our Christmas tree up in September.

We got an interesting call today. There's a phenomenon lately here in Australia, maybe in some other western countries, where the Indians call you, and telling you they're calling from "Windows Technical Department". The line's always really shabby, it's like they're on a walkie talkie from Big W. I've never been too
Christmas in September.
far with them but I read a couple years ago that their thing is to get you to look at a certain folder in Windows on your computer. Then, they tut-tut while they tell you that they can see you have lots of malware installed on your computer, and to clean it, please go to xyz website where of course, you can download a program to get rid of all your nasty malware.

What you download puts malware on your computer.

Usually I laugh uproariously at them until they hang up but this time I had a little fun. I asked the woman on the phone if she could hang on. She said yes and I dumped the phone in the next room and made a point to forget about it.

Five minutes later I put the phone to my ear and she was still there. Some twenty minutes later Mrs Speech hung the phone up. Mrs Speech didn't seem all that happy with me, but I say anyone who cold-calls you, attempts to defraud you out of your computer security and gives you a virus, while treating you like an idiot who just fell out of that tree over there, the really big one...gets what they ask for.

That was our day!
To skip straight to the tutorial, click here.

I would like to regularly feature tutorials and share patterns with you. Also I will frequently be sharing my works in progress and other crafty happenings. I would love to hear from fellow sewing enthusiasts. Feel free to get in touch with me and if you have a craft blog share your link so I can stop by for a visit!
Quilting and tea go hand in hand...for me. I always have a cuppa while I'm sewing. Thus, my idea for a wall clock of sorts for my craft room. Like a good pot of tea, I'm sharing it with you. Special thanks to Fluffy Sheep Quilting for the fabric.

I've had this idea in mind for some months now. I sketched it out and had great fun bringing it to life. Do you sketch out your ideas?

Originally, I was thinking of making this with a working clock mechanism - which you should be able to find at your local craft store. As I was working with a budget and a deadline, I decided against it. I am quite happy with the result. Though, the working clock idea is still in the back of my mind. You see, my craft room does not have a clock and needs one. Hmmm....another project for another day.

Now, with my new wall hanging, in my craft room it is always tea time.

Materials


(Click image to enlarge in-screen.)

1. Fat quarter bundle of the Serenade Collection

2 & 3. Templates: to download, click image to enlarge, then right click and select 'save image as...'

  • fat quarter bundle of the Serenade Collection
  • 18” x 22” batting/wadding
  • fusible interfacing
  • heavy black/dark fabric
  • white thread
  • black thread
  • your choice of colored thread for top stitching (see Fluffy Sheep’s selection of Aurifil thread)
  • orange button
  • scissors
  • needles
  • pins
  • measuring tape
  • sewing machine


Assembly:


Iron
I always begin by putting the kettle on so that I have a nice hot cuppa tea to drink while I’m working on my projects. While the kettle is boiling, I find that this is a good time to do the necessary ironing. Ironing is not a favorite chore of mine. Unless I’m ironing fabric, then it’s fun and not work.

Cut
(Click each image to enlarge in-screen.)

1. Rabble of Butterflies, Purple Peacock. Second row left to right: Purple Filigree, Orange Filigree

2. Fabric for the teapot

3. Fabric for the spout

4. Fabric for the lid

5. Fabric for the handle

6. Making the clock hands

7. Blanket stitching around clock hands

Cut out the paper templates. Use paper cutting scissors - please do not use your fabric scissors.

Next, cut out the fabric and interfacing. I used these fabrics for my teacups.

I fussy cut (cut around the shape of the design, in the fabric) each of my teacups. This beautiful Serenade collection brought teacups to mind immediately, as it reminded me of fine china. Place the teacup templates on the design you want to feature on your teacups. I chose to cut the Purple Peacock fabric so that the lines were horizontal on my teacup.

For the teapot, I pieced my teapot together with fabric showcased in each teacup to give it a patchwork look. I did this by dividing the pot part of the teapot into four 2 inch squares. I mixed up the four fabrics to get a patchwork look for my teapot: Rabble of Butterflies, Purple Peacock, Purple Filigree, Orange Filigree.

I also chose a fabric for the spout, lid, and handle.

Lastly, cut out your clock hands (four - front and back with interface inbetween) from the black fabric(x4) and interfacing(x2).

Interfacing

Place teacups on interfacing and cut out. Be sure to cut out the inside of the handle. Do the same for the teapot and the clock hands.


Pin
(Click each image to enlarge in-screen.)

1. Blue Grain

2. Find the center of the fabric and pin teapot

3. Arrange tea cups to resemble a clock face

4. Pin teacups
Before pinning the teapot, teacups, and clock hands, lay your background fabric the long way (22 inches wide).

Find the center of the fabric and pin teapot with interfacing behind it to the center of the background fabric (see left). Arrange the teacups around the teapot like you are looking at a clock. Pin teacups with interfacing (on wrong-side of fabric) to background fabric at 12 o’clock, 3 o’clock, 6 o’clock, and 9 o’clock.

Just for fun, I tilted my teapot so that it looks like it is pouring tea into the 6 o’clock teacup.

Sew/Applique/Blanket-Stitch

(Click each image to enlarge in-screen.)

1. Applique-ing

2. Don't forget the clock hands

Depending on your level of sewing experience, you may or may not want to dash to your sewing machine and rev it up to applique each teacup and the teapot. If you are confident, go for it! Choose a vibrant colored contrast thread for topstitching and, “You sew girl!”

If you are not so adept at applique, you may want to:

a) ease into a comfy chair, put on your favorite movie, and leisurely stitch around the teapot and each teacup basting them securely in place with white thread, and blanket stitch around each with a colorful thread

b) sit down at your sewing machine and get it humming as you stitch around the teapot and each teacup with white thread, going back over each with the zig-zag stitch on your machine in a colorful thread

c) take your chances with the colorful thread and crazy quilt stitch around the teapot and each teacup

Don’t forget the clock hands. Tack down at center of teapot. Sew button on top of the ends (non-arrow end) with black thread.


Batting/Wadding

(Click each image to enlarge in-screen.)

1. Blue Leaves

2. Lay your backing fabric on the batting/wadding

3. Cut a fat quarter size
I say, “toe-may-toe”. You say, “to-mah-to”. Batting and wadding are one in the same. I’m American, it’s “batting” to me. To Australians, it’s “wadding”. I recommend using a low loft batting/wadding.

Lay your backing fabric on the batting/wadding and cut out a fat quarter size (18” x 22” - see right).

Now, make a sandwich: backing + batting/wadding + background w/teacups = “Tea Time”.
Remember your fabrics:
backing - Blue Leaves
background w/teacups - Blue Grain

Quilt


(Click image to enlarge in-screen.)

1. Hand quilting

Pin the sandwich together - the three layers: backing + batting/wadding + background w/teacups.

Quilt as desired. Personally, I find hand quilting very relaxing. Yet, if I’m in a hurry, I turn to my Elna. For this project, I chose to hand sew around each teacup and the teapot and each loop.

Binding
Using the remaining fabric from the teacups, cut strips 2 inches x width of fabric. Alternate the strips from the four fabrics and sew together end to end, giving you a very long 2 inch strip.
Fold in half and use your iron to press.
Unfold.
Fold the top half to the pressed line in the center.
Fold the bottom half to the pressed line in the center.
Now you have binding for your quilt. Pin in place to the front side of wall hanging (wrong-sides together) and sew with machine.

Next, fold down the binding to the back side of the wall-hanging (right-sides together), pin and sew by hand.

Finished! Pour yourself a cuppa. It’s definitely tea time. You deserve it.


I'm linking up with Sew Can Do for Craftastic Monday.


and The Trendy Treehouse for Create and Share.


and Sugar Bee Crafts for Take A Look Tuesday.